
About Tactical Navigator
Tactical Navigator is a navigation application that guides your way around based on your location and direction of movement.
The variety of options allows many types of uses, such as in urban or open space, coordinates, or to places you visited and saved.
The application also includes a full Military Grid Reference System (MGRS) support and designed to meet your military needs.
With this support, you will be able to find your way in the field towards your destination.
The Tactical Navigator offers you a clear and efficient navigation interface that keeps your absolute orientation in any direction change,
displays your route track line, and has a built-in compass mechanism with auto-rotation, speedometer, and altimeter. While navigating, you can view information about passed distance and estimated aerial arrival time to the destination, get area and navigation analysis data, add and save waypoints, and more.
The app also includes a built-in flashlight with optional camouflage colors of red and ultraviolet. The ultimate way to read documents in the field without being detected. Our special flashlight will not turn off on hands moving gestures and screen brightness will be set to the maximum while the flashlight is on.
The application is designed for smartwatches,
with a carefully thought user experience.
It is adjustable and has a variety of user settings and preferences to configure by your needs.
The application is battery-friendly and handles the use of the GPS sensor so that it's activated only when needed.
SECURITY
The application is standalone, no need for additional mobile application and, it does not use any internet connection - the compiled
code runs only on the device - no data is sent or received from any remote server,
as a result, the app has a very low signature.
The Tactical Navigator application is part of Codverter`s navigators series.
You may want to see a comparison table between the apps.
You can see the comparison table HERE.
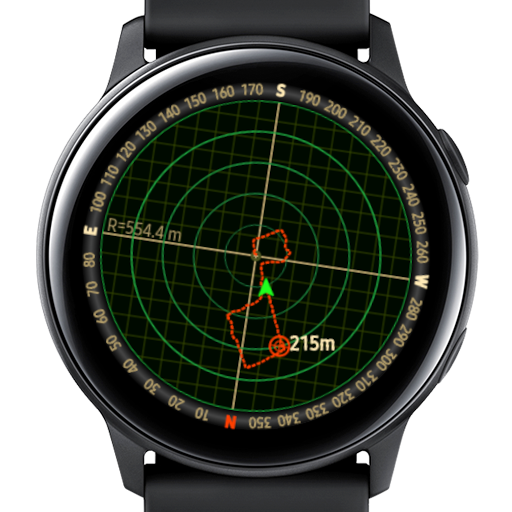
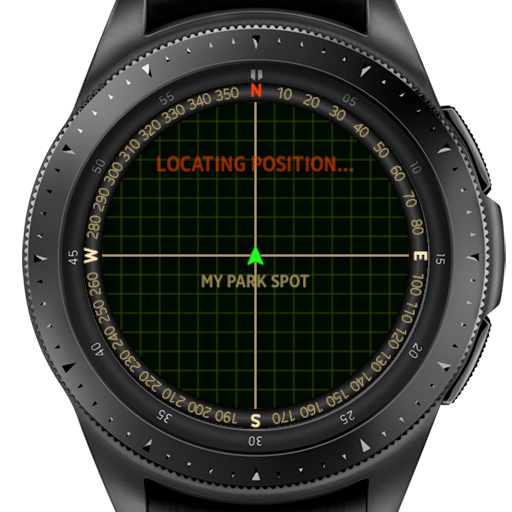
Navigation Window
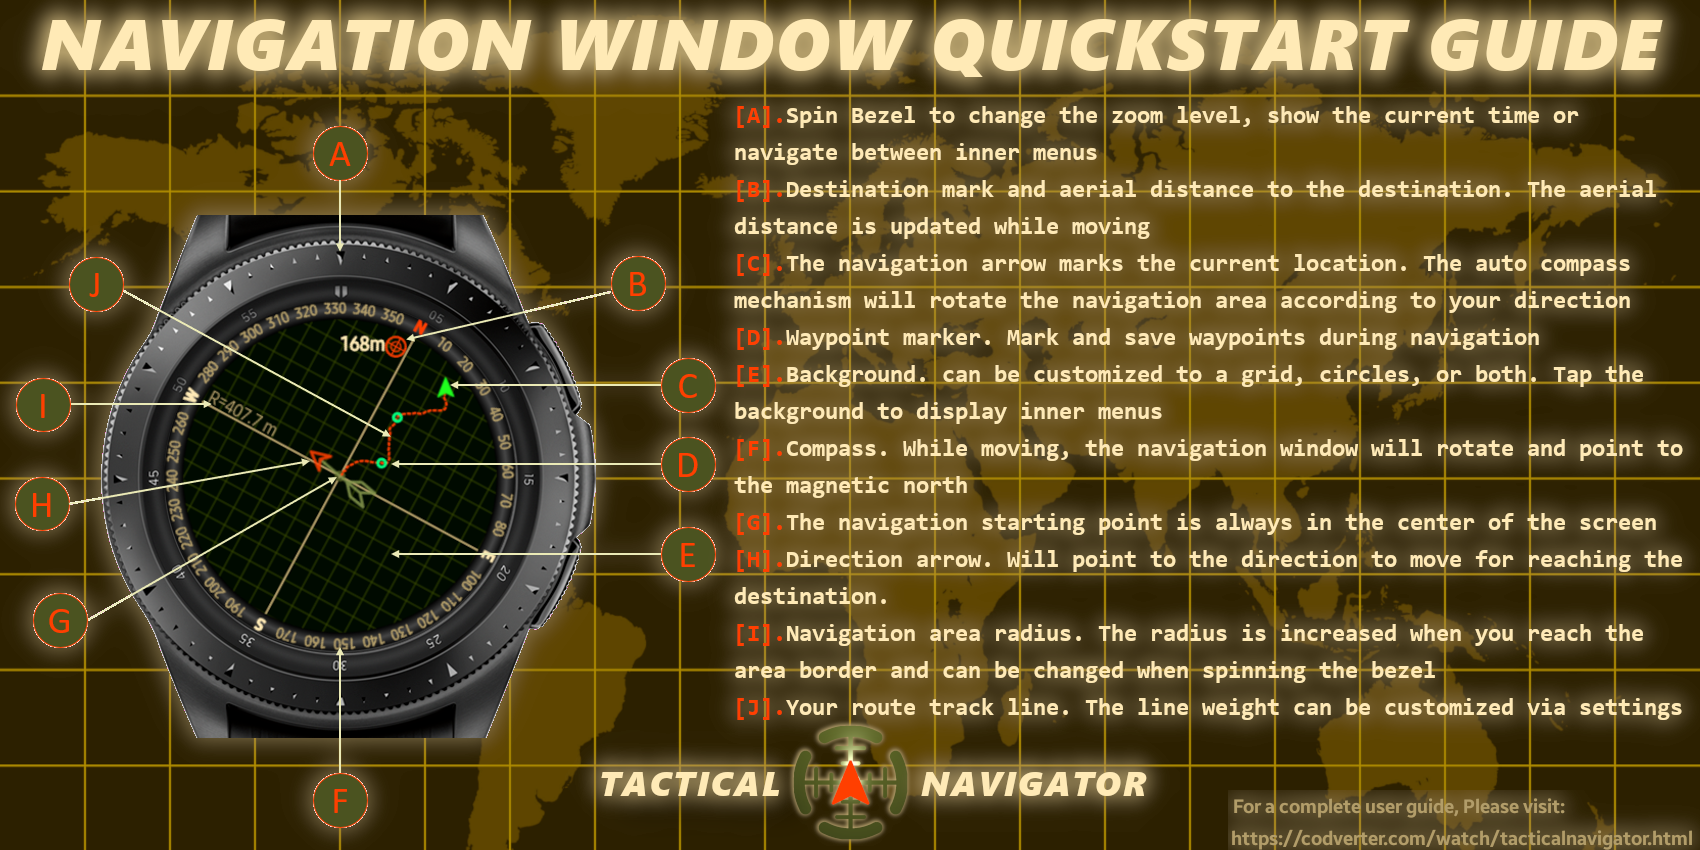
This screen opens when you start navigation.
The starting point is the center of the screen and the destination [A] is marked with a red flag.
As you move around [B], your route track line will appear on the screen [E]. The aerial distance to the destination is updated while you move [A].
You can tap anywhere on the screen to view more options and quick settings.
Navigation Window Menu
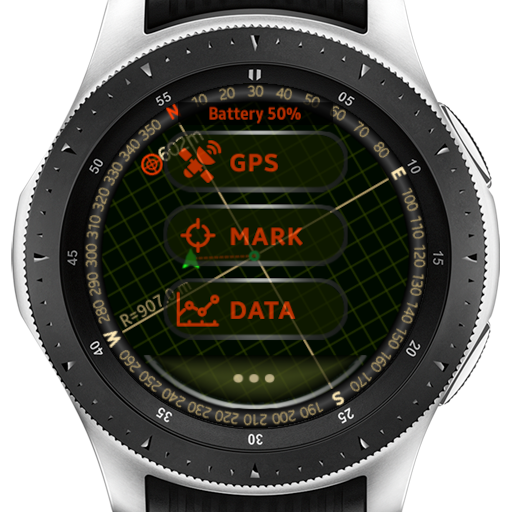
By tapping on the navigation window, more options and quick settings are available.
TIP: when this menu is displayed (or one of the internal menus) you can navigate through all the menus by spinning the bezel.
GPS
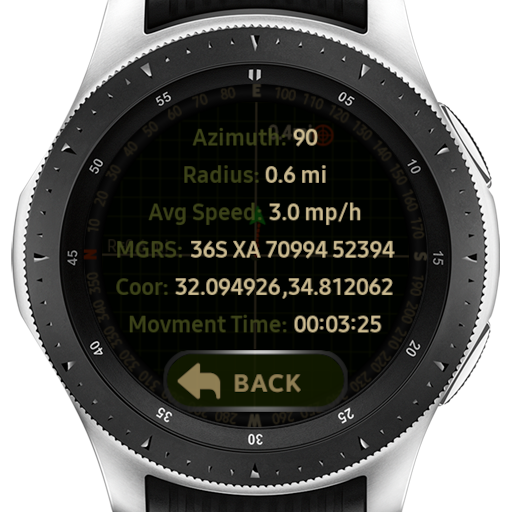
View additional information about your current location and speed.
- Azimuth - the angular direction to the destination
- Radius - radius of the navigation window
- Avg. speed - the average speed sampled when in movement
- Coor - current location coordinate
- Movement time - total time of movement
Mark
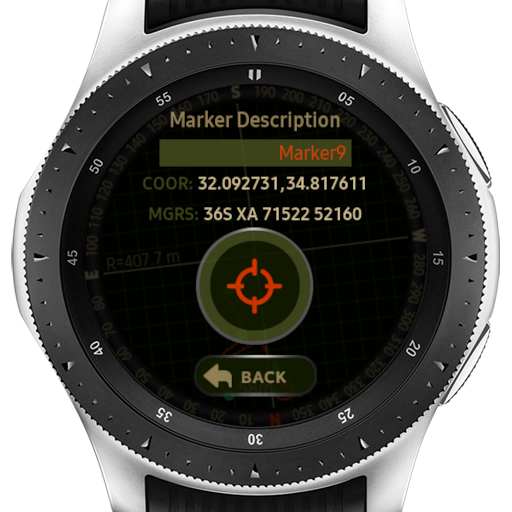
Mark waypoints during the navigation, the marked location will be drawn to the navigation surface as a green circle and will be saved to the markers storage in the main menu.
Data
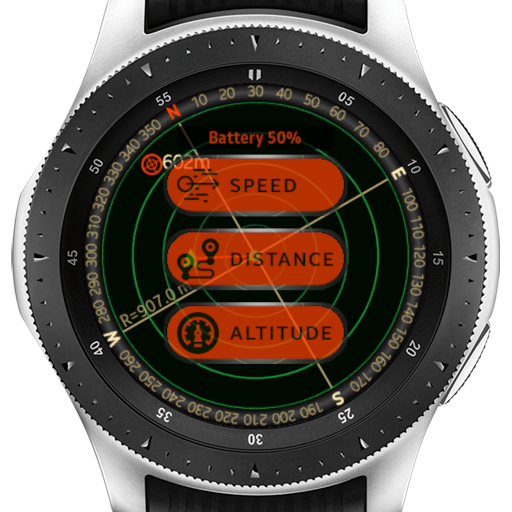
View speed, distance, and altitude data of the navigation.
Speed
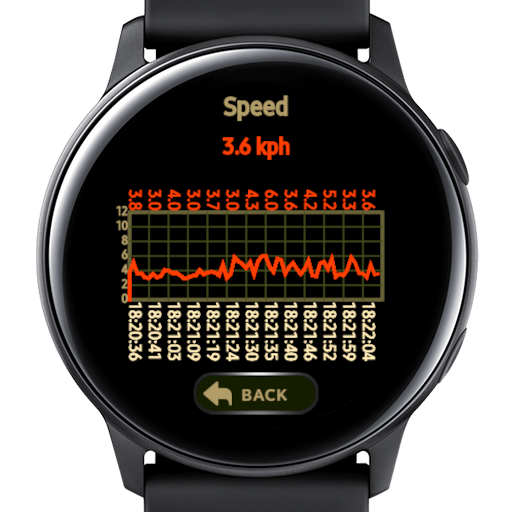
Visual display of the speed over the time of navigation.
Distance
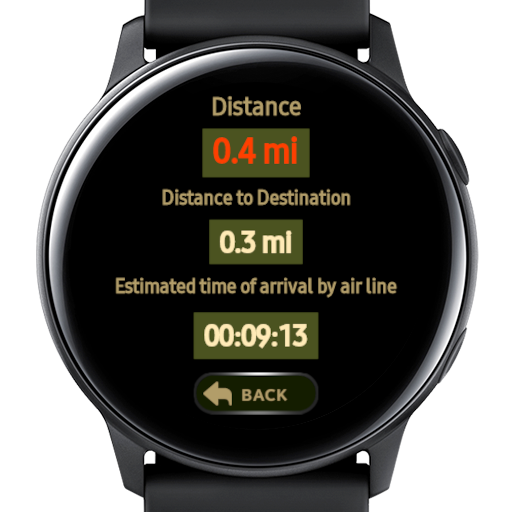
Elapsed distance, the remaining distance to the destination by direct aerial route, and the estimated arrival time by the direct aerial route.
Altitude
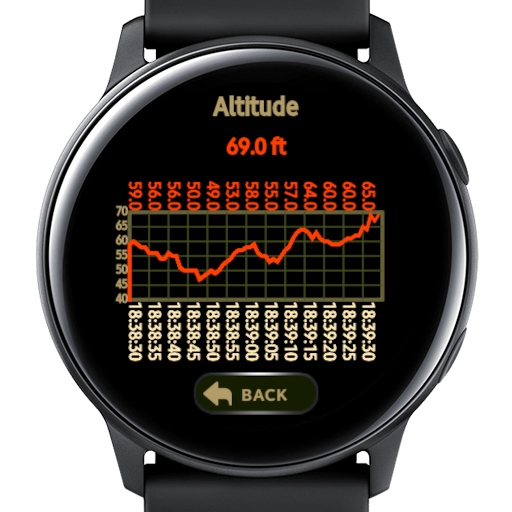
Visual display of the altitude over the time of navigation.
Quick Settings
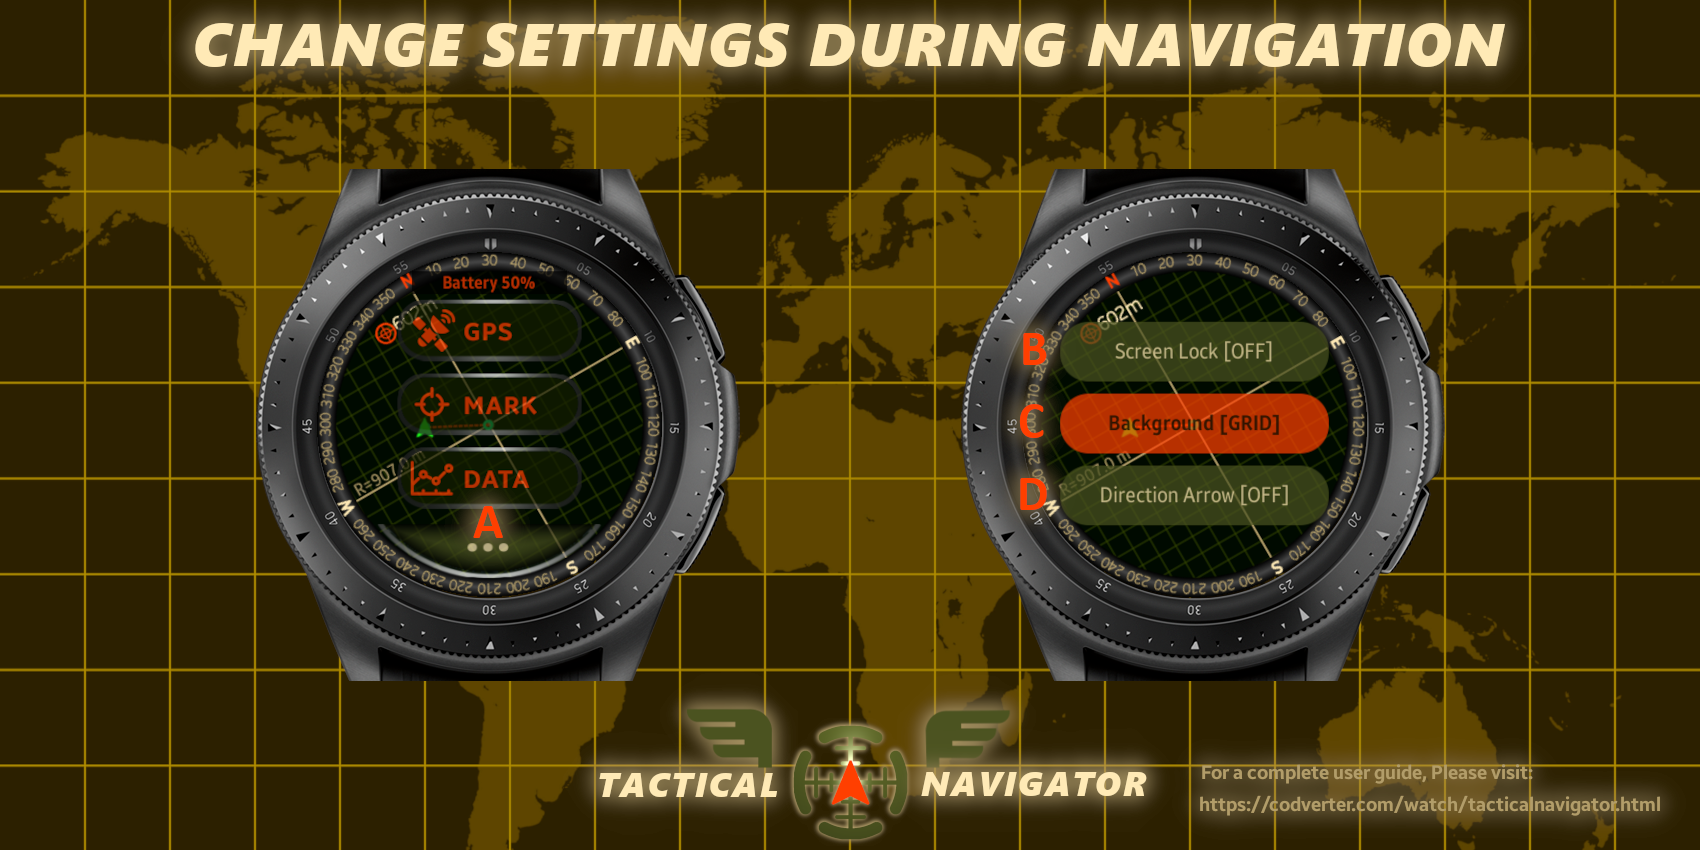
Access quick setting options [A].
Please note: the setting property that has been changed will be changed for the current session of the app.
Use the settings from the main menu to make the change permanently.
Screen Lock [B]
When "ON" the screen will not turn off on hands moving gestures and the application will be shown on the foreground while navigating.
The default mode is "OFF".
Window Background [C]
Select the navigation window background - only grid, only circles, or both.
Direction Arrow [D]
When "ENABLED" an arrow will be displayed in the middle of the navigation window, always pointing in the direction of the destination, relative to the current location.
This option is very useful when the navigation arrow is close to the destination, then the direction of movement to the destination can clearer.
The default mode is "DISABLED".
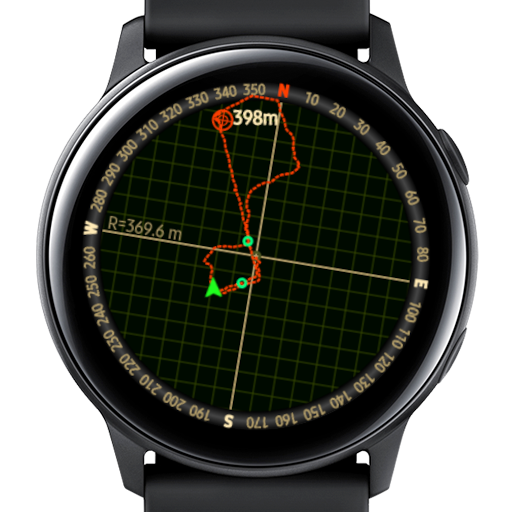
Direction Arrow Auto Initialization (See also update 1.0.1)
Version 1.0.1 of the application was updated with a new feature - raising the direction arrow automatically.
When your current location has passed a little more than half of the way to the destination,
the direction arrow will be displayed on the screen [as illustrated in the picture above].
The reason for this is that as long as you get closer to your destination,
the destination flag and the navigation arrow are very closed to each other, as a result, the space between those elements becomes dense.
The direction arrow will clearly show you which direction you need to go.
Note: Unlike the navigation arrow that shows your position in the navigation space,
the direction element shows you the direction you need to go to reach your destination.
As you can see in the picture under this paragraph, the navigator is moving to azimuth 250° (as you can see if you look at the green navigation arrow).
As the direction arrow shows, the navigator needs to take a half right (azimuth ~285°) to reach exactly to the destination.
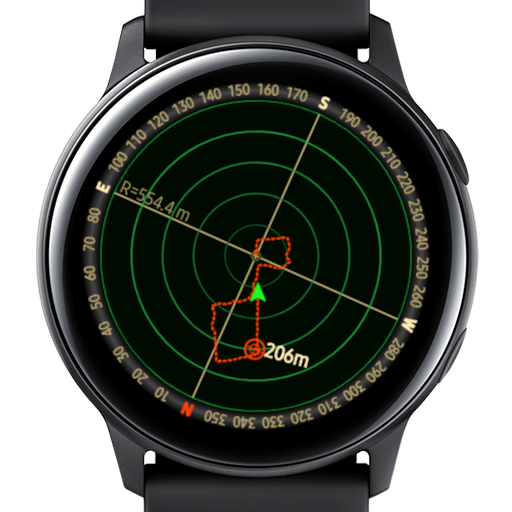
Zoom Level
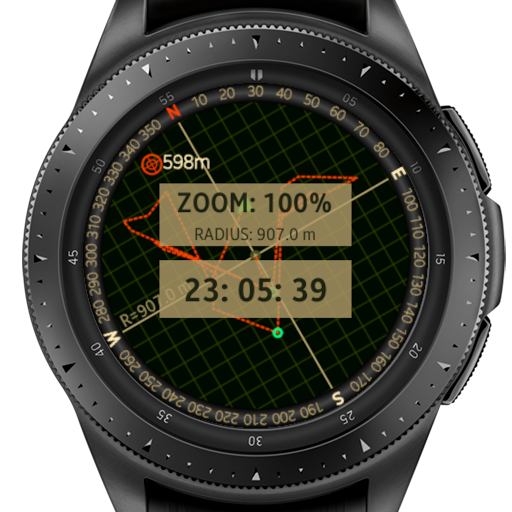
Spin the bezel clockwise direction to increase the zoom level and counterclockwise to decrease the zoom level.
Changing the zoom level causes the area radius to change.
Increasing the zoom level (clockwise) will increase the radius and vise versa.
The minimum value of the zoom level is the initial radius of navigation.
The maximum value of the zoom level is 250% of the current radius.
Note: the radius can be increased when you reach the area border, in this case, the baseline for the 250% is the new radius.
When spinning the bezel the current time will also be displayed.
Tip: decreasing the zoom level (counterclockwise) can be very useful in a special case when you expand the area border (for example moving in the opposite direction of the destination) and later move towards your destination again.
Such movements will be expressed as a dense image between the elements on the navigation screen (because the radius was increased).
To deal with it, just spin the bezel counterclockwise to return to 100% zoom level (the initial radius of navigation), and the elements on the navigation screen will become less dense to view and adjust to the current radius.
Destination Arrival
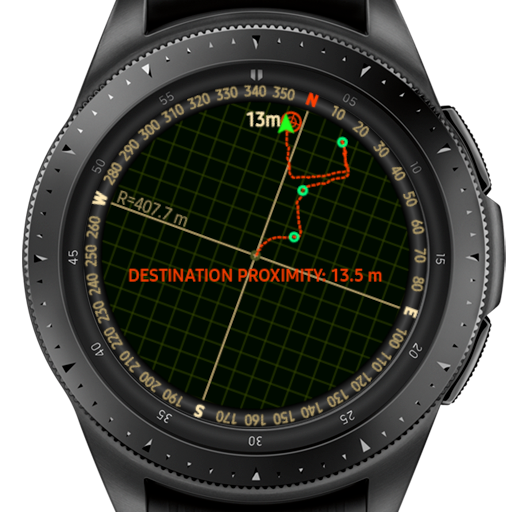
About 16 m/52 ft from the destination, sound and vibration notification will be activated and a flickering message will be displayed showing the proximity to the destination.
Note: if you need to be silent you can disable the sound notification via user settings.
Main Menu
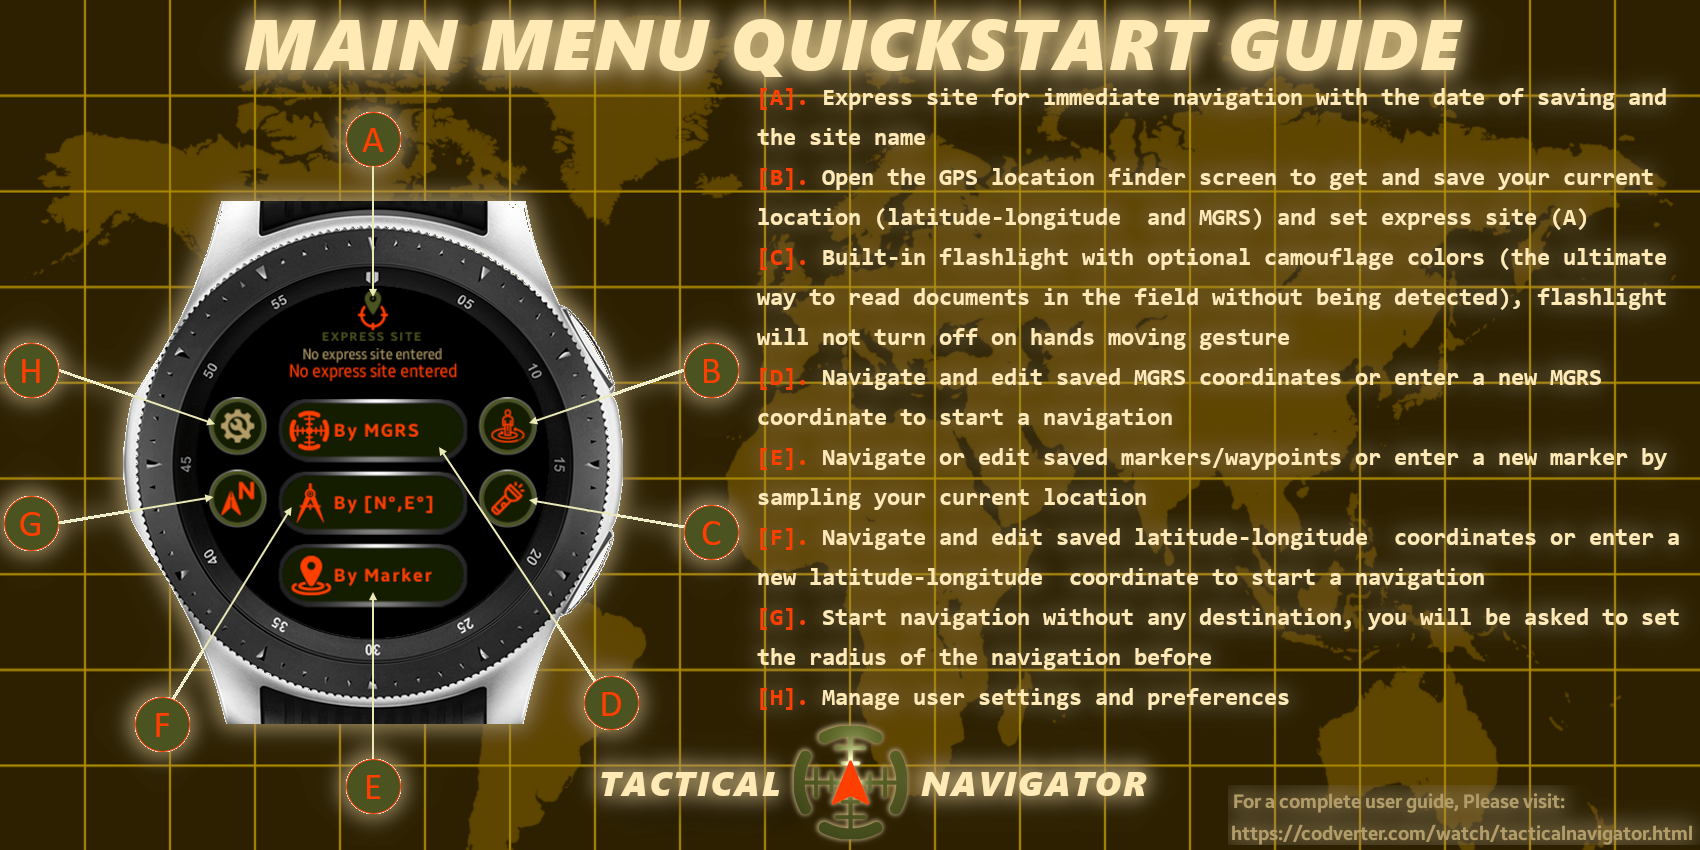
In the application main menu you can start new navigation, save your current location as a marker, or configure the settings.
Navigate to MGRS Coordinate [Button D]
What is Military Grid Reference System (MGRS)
The Military Grid Reference System (MGRS) is the geocoordinate standard used by NATO militaries for locating points on Earth. The MGRS is derived from the Universal Transverse Mercator (UTM) grid system and the Universal Polar Stereographic (UPS) grid system, but uses a different labeling convention. The MGRS is used as geocode for the entire Earth.
MGRS coordinate is constructed from 3 parts:
1. Grid zone designation - The 6° wide UTM zones, numbered 1–60,
are intersected by latitude bands that are normally 8° high, lettered C–X (omitting I and O).
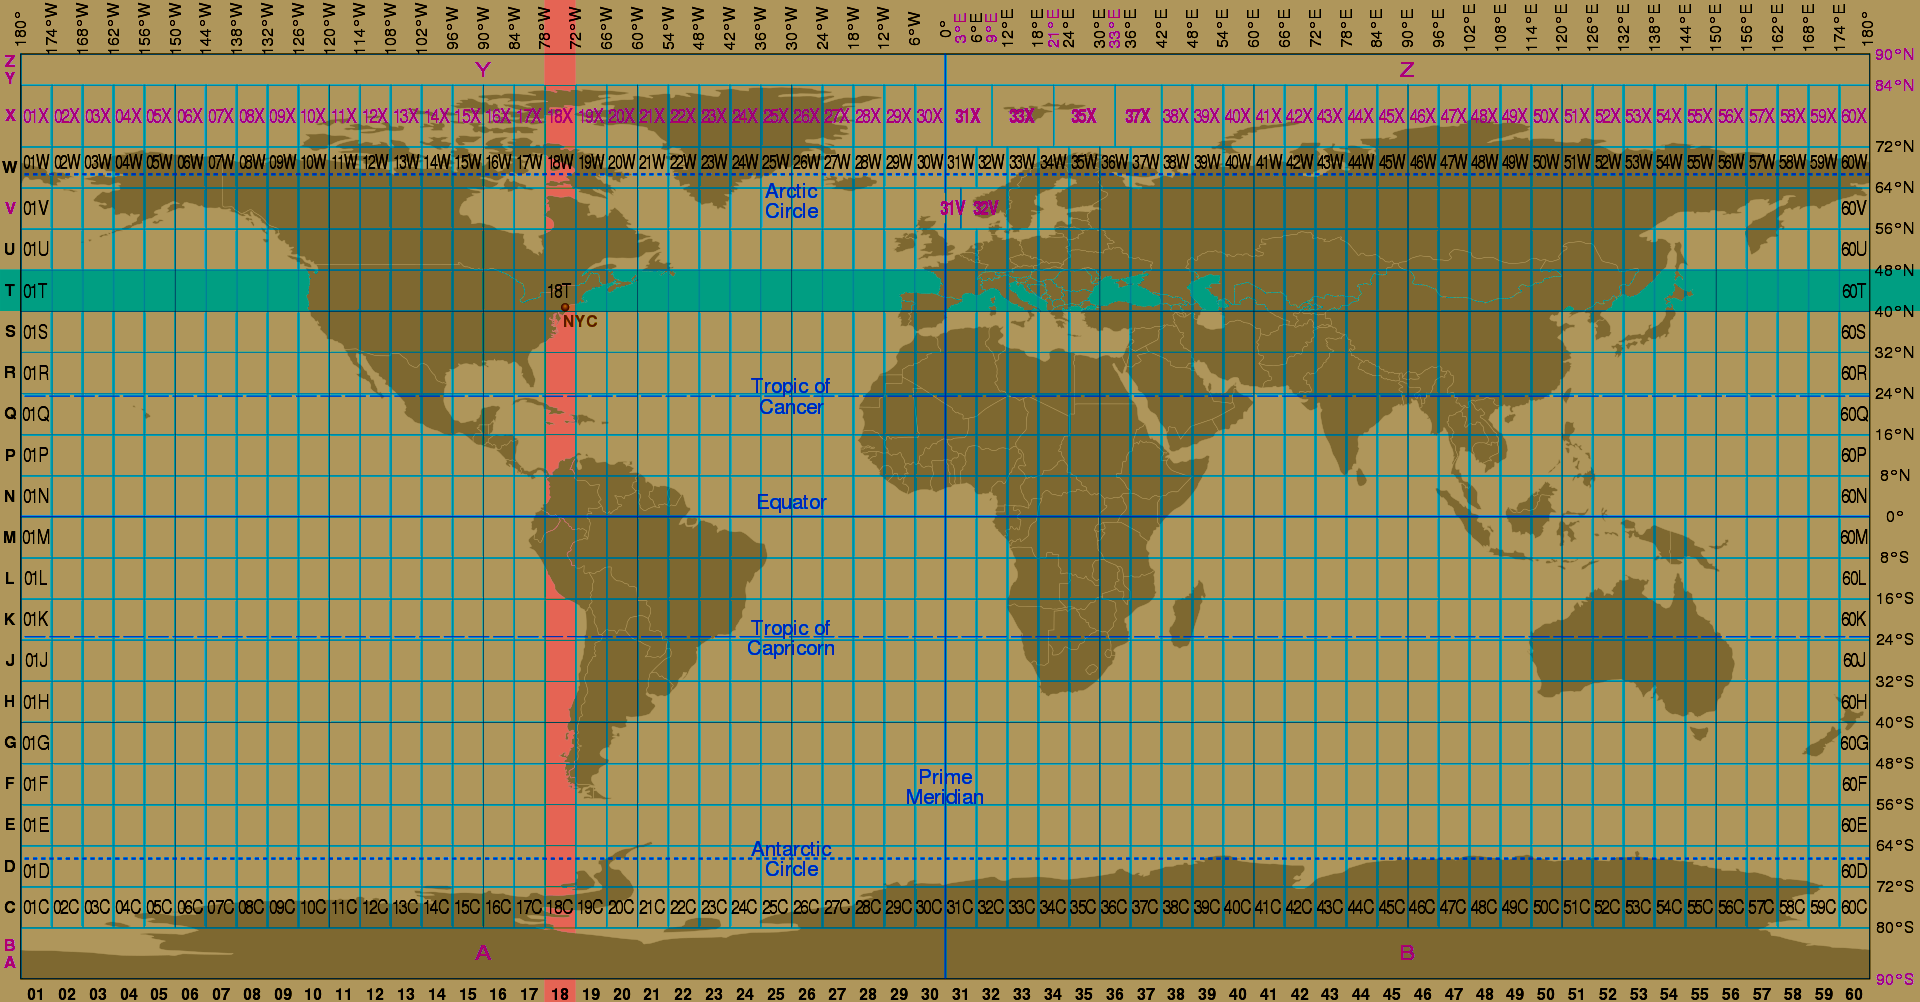
2. 100,000-meter square identification - the 100,000-meter square identification. Each UTM zone is divided into 100,000-meter squares, so that their corners have UTM-coordinates that are multiples of 100,000 meters. The identification consists of a column letter (A–Z, omitting I and O) followed by a row letter (A–V, omitting I and O).
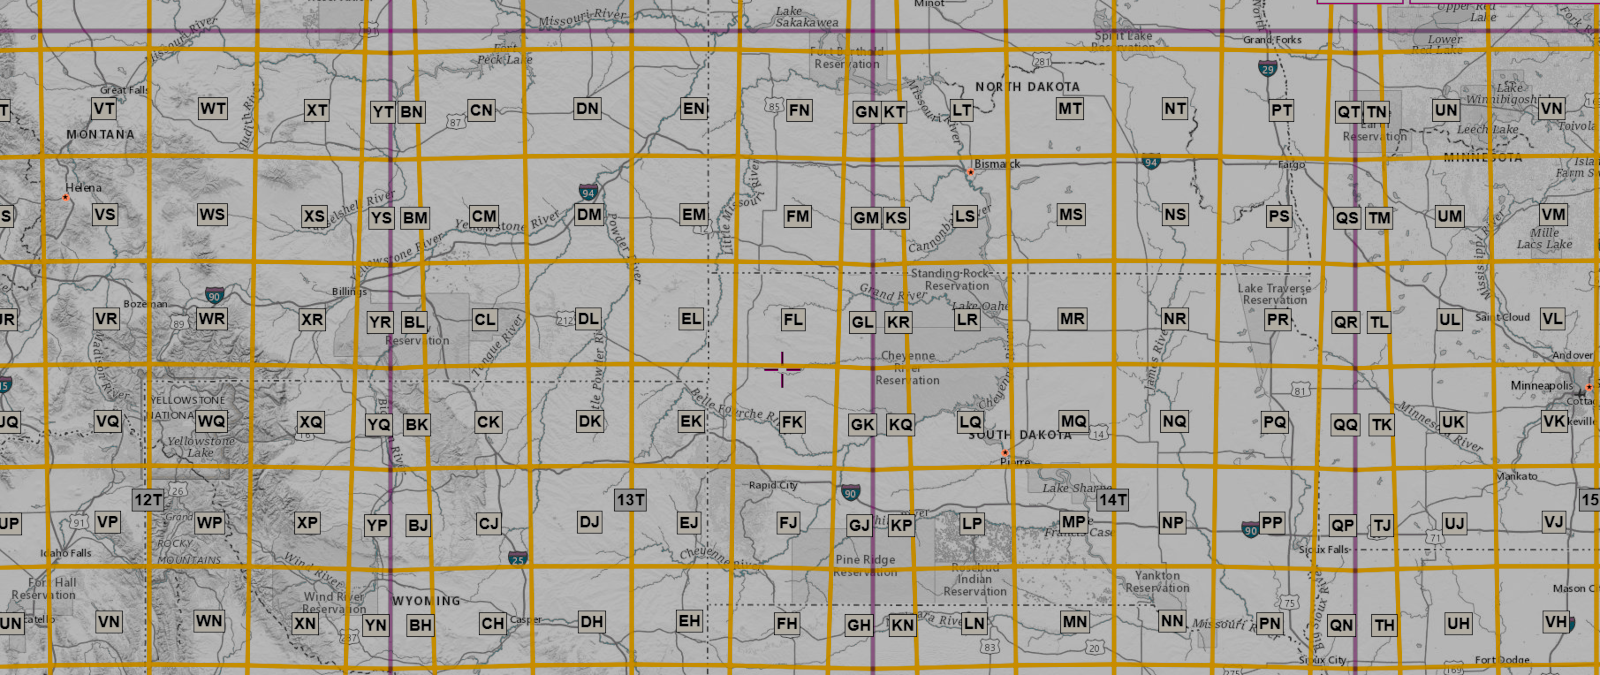
3. Numerical location - the numerical location within a 100,000-meter square, given as n + n digits, where n is 1, 2, 3, 4, or 5. If 5 + 5 digits are used, the first 5 digits give the easting in meters, measured from the left edge of the square, and the last 5 digits give the northing in meters, measured from the bottom edge of the square.
Here are a few variations of MGRS coordinate::
- 4Q .....................GZD only, precision level 6° × 8° (in most cases)
- 4QFJ ...................GZD and 100 km Grid Square ID, precision level 100 km
- 4QFJ 1 6 ...............precision level 10 km
- 4QFJ 12 67 .............precision level 1 km
- 4QFJ 123 678 ...........precision level 100 m
- 4QFJ 1234 6789 .........precision level 10 m
- 4QFJ 12345 67890 .......precision level 1 m
[Taken and summarized from Wikipedia, read more Here]
[You can visit a nice dynamic online MGRS map Here]
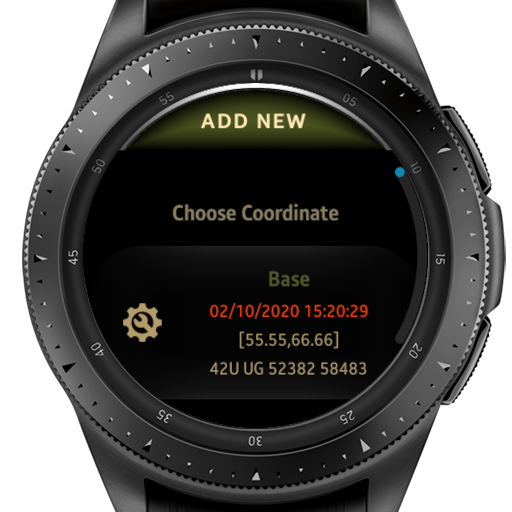
Navigate to MGRS
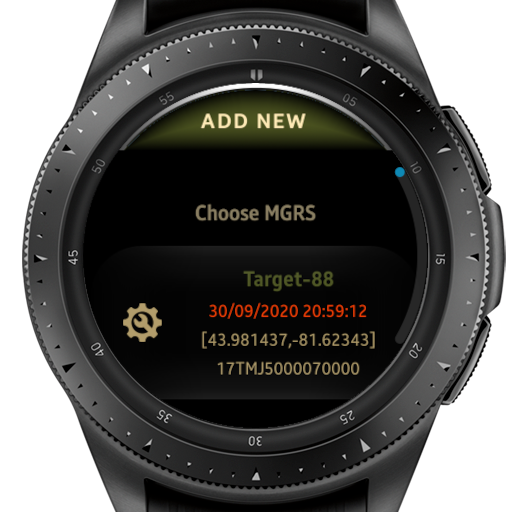
Start navigation to a new coordinate (MGRS), navigate to a saved one, or edit your saved MGRS coordinates. To start navigating, click on a saved MGRS to navigate to it, or select the "Add New" to navigate to a new coordinate. If an MGRS coordinate is set as the express site, its title will be marked in orange.
Enter New MGRS
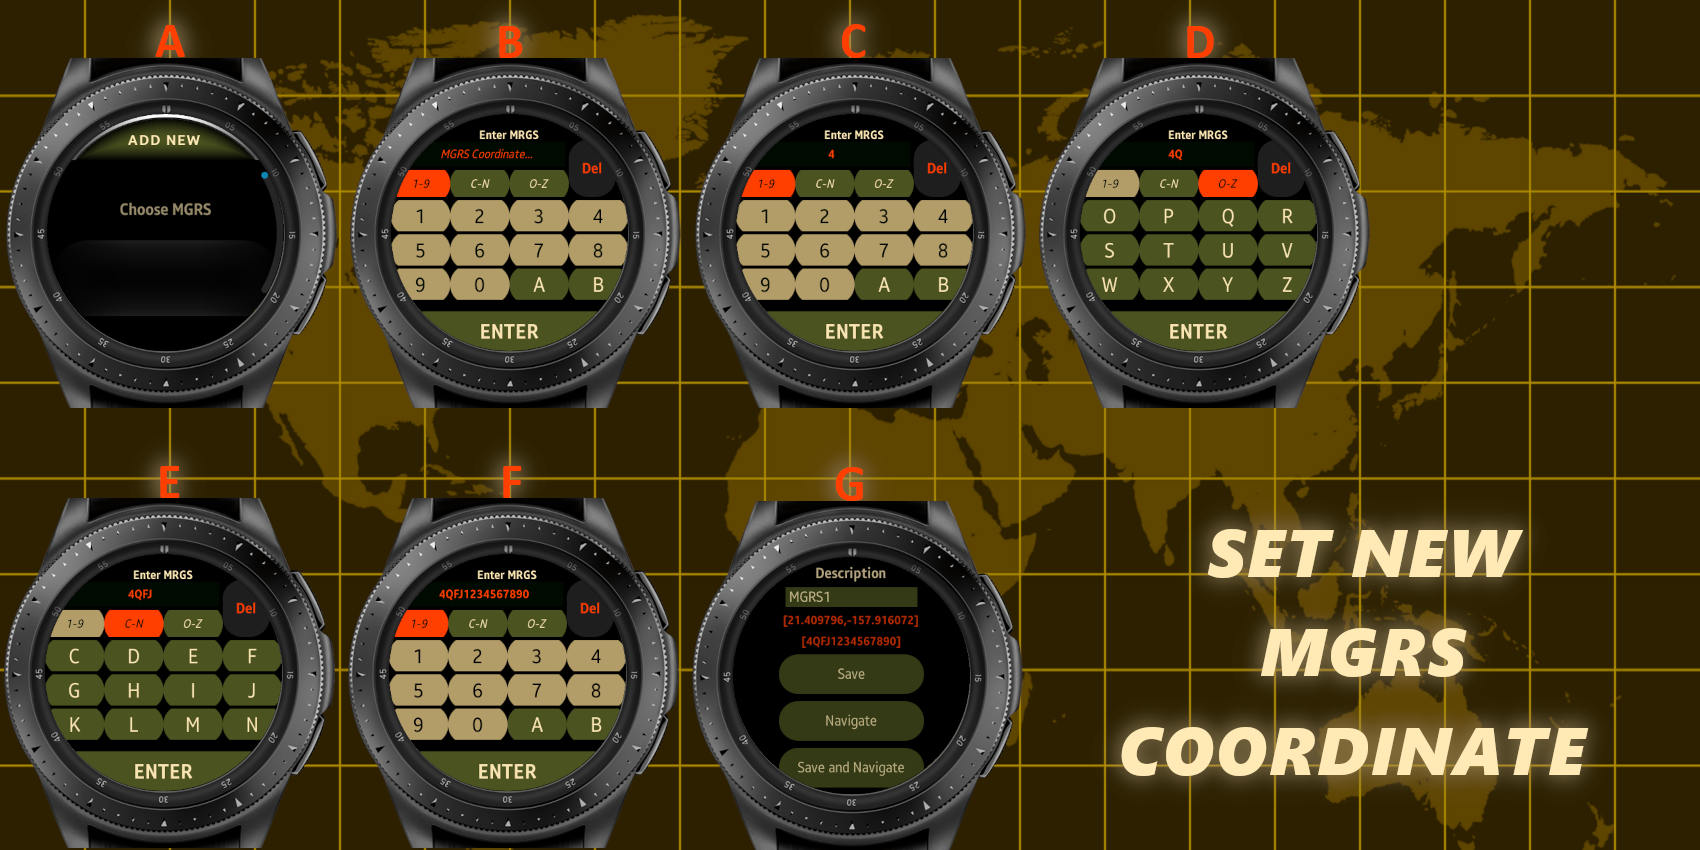
Here is a demonstration of entring a new coordinate (4QFJ 12345 67890) according to the image above:
[A]. Click "ADD NEW" to display the MGRS Entrance Interface.
[B]. Type the first character of the Grid zone designation (4).
[C]. Change to O-Z keyboard by spinning the bezel or by clicking the M-Z button and type the second character of the Grid zone designation (Q).
[D]. Change to C-N keyboard by spinning the bezel or by clicking the M-Z button and type the 100,000-meter square identification (FJ).
[E]. Return to 1-9 keyboard by spinning the bezel or by clicking the 1-9 button and type the easting and northing numerical location (12345 67890).
[F]. Press ENTER and the application will validate the MGRS you have entered.
If the MGRS is not valid, you will be notified with a short message and an Issue Number (read the invalid MGRS Messages section for additional data).
If the MGRS is valid screen G will be displayed.
[G]. Now you can save, start, or save and start navigation to the MGRS coordinate.
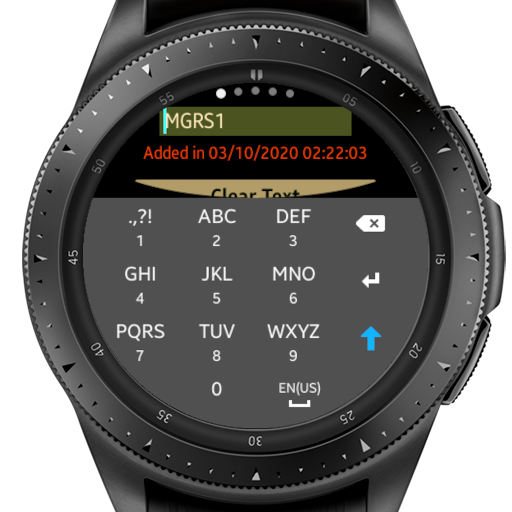
By pressing the MGRS default title, a keyboard will be displayed and will allow you to change the MGRS coordinate name.
• MGRS coordinate will always be converted and displayed as latitude-longitude coordinate.
Invalid MGRS Messages
After entering a new MGRS coordinate, it will be verified by the application. invalid input will cause a message containing an issue number will be displayed. below is a list of reasons for the issue numbers.
| Issue Number | Description |
|---|---|
| ISSUE 101.1 | The Grid zone designation you have entered has only one character. GZD can not contain only one character unless it is a pole zone GZD. pole zones GZD can be only A, B, Y, or Z |
| ISSUE 101.2 | MGRS length is not valid. |
| ISSUE 101.3 | Grid zone designation is not valid - The letter combination does not exist. For example, 36S is a valid GZD, but 91R is s not possible. |
| ISSUE 104 | The first part of the GZD is not numeric. |
| ISSUE 105 | The second part of the GZD is not legal. |
| ISSUE 106 | The first character of the 100,000-meter square is not valid. |
| ISSUE 107 | The second character of the 100,000-meter square is not valid |
| ISSUE 108 | 100,000-meter square is not valid - The letter combination does not exist inside the GZD. |
| ISSUE 109 | The easting and northing of the Numerical location is not even or to short or to long - The easting and northing of the Numerical location length can be only 2, 4, 6, 8, or 10 charcters. |
| ISSUE 110 | The easting value is not fully numeric. |
| ISSUE 111 | The northing value is not fully numeric. |
| No number |
• Outside permissible range of easting values.
• Negative values are not allowed for northing. • Northing may not exceed 10,000,000. • General input error. |
Edit Existing Coordinate
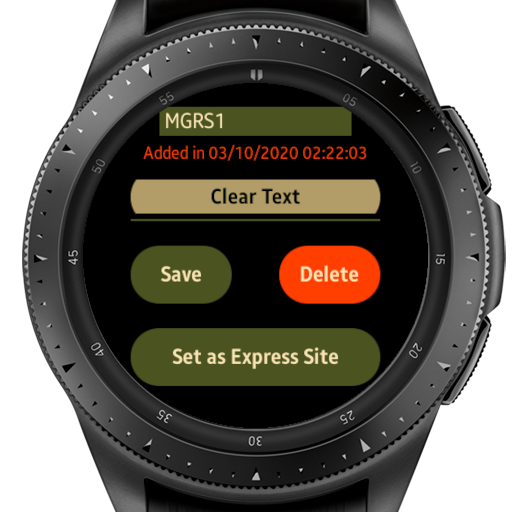
Edit the name of a saved MGRS coordinate, delete it, or set it as the express site.
Navigate to Latitude-Longitude Coordinate [Button F]
Start navigation to a new coordinate (latitude and longitude), navigate to a saved one or edit your saved coordinates.
To start navigating, click on a saved coordinate to navigate to it, or select the "Add New" to navigate to a new coordinate.
If a coordinate is set as the express site, it will be marked in red.
Enter New lat-long Coordinate
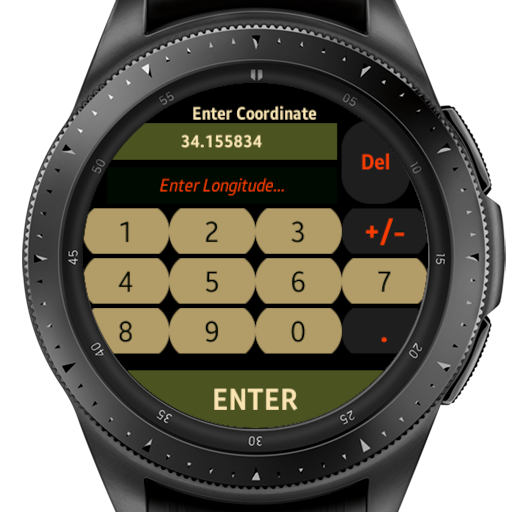
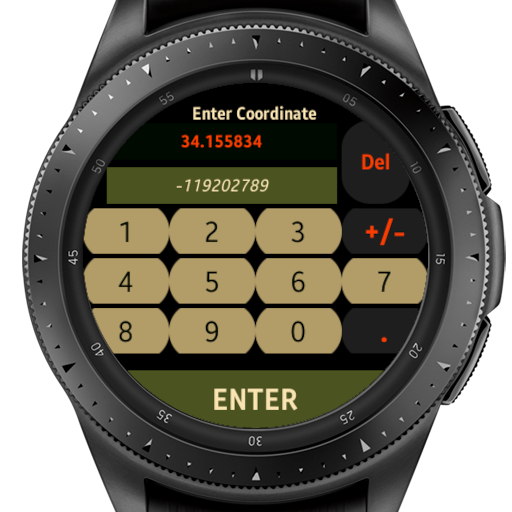
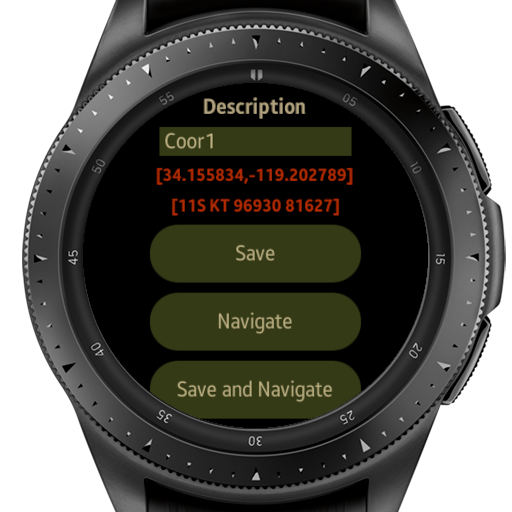
Add a new coordinate by entering the latitude and longitude. You can navigate between the latitude and longitude text boxes by spinning the bezel or by tapping the required text box.
Edit Existing lat-long Coordinate
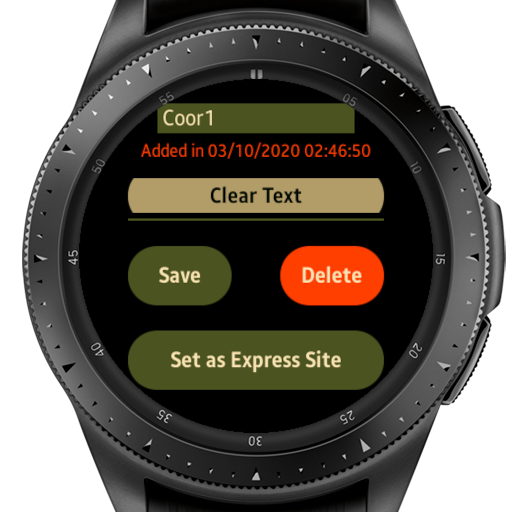

Edit the name of a saved coordinate, delete it, or set it as the express site.
Navigate to Marker [Button E]
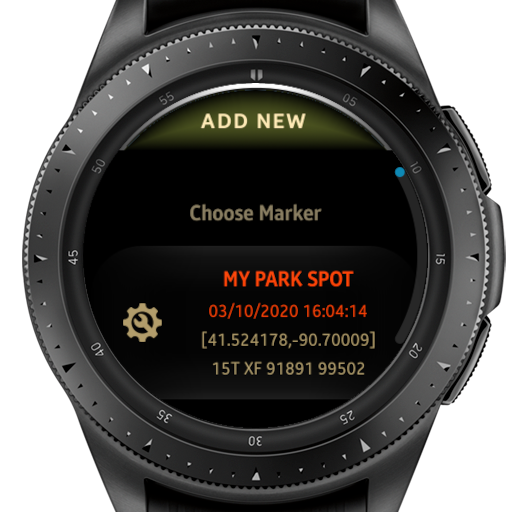
A marker is a site you visited and saved.
In this screen, you can save your current location as a marker, navigate to a saved one, or edit your saved markers.
To start navigating, click on a saved marker to navigate to it.
If a marker is set as the express site, it will be marked in red.
Take GPS Sample of a New Marker
The GPS will get your current location, and you can add it as a new marker for later use.
Edit Existing Marker

Edit the name of a saved marker, delete it, or set it as the express site.
Free Navigation [Button G]
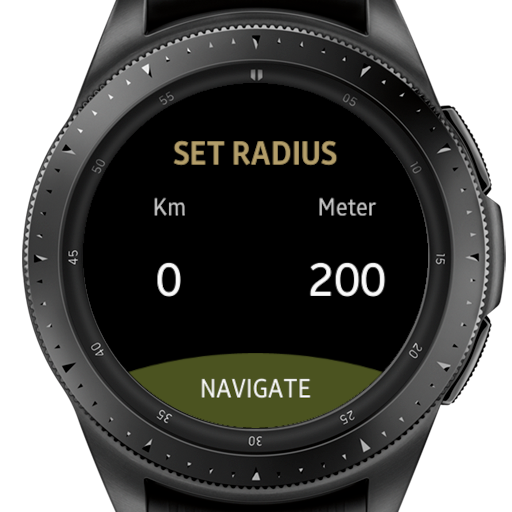
Free navigation is designed to navigate without a destination.
Set the navigation window radius and track your route.
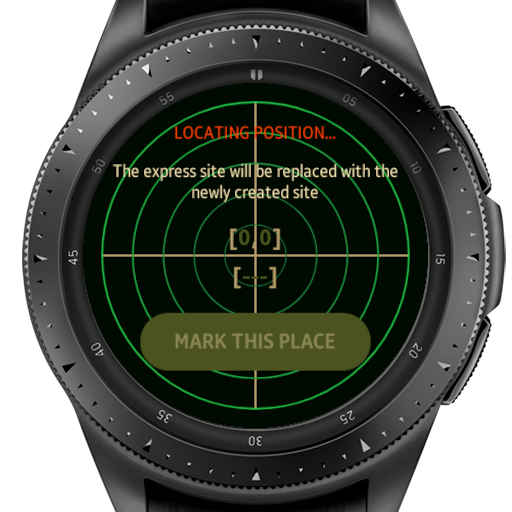
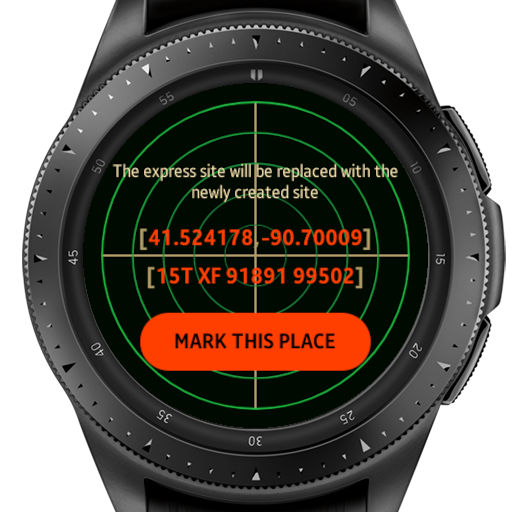
Set Express Marker [Button G]
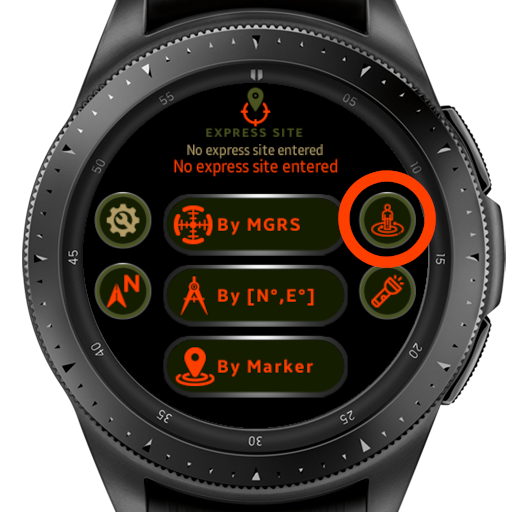
Opens the GPS location finder screen to get your current location and set it as the express site. It will also be added to your saved markers.
Navigate to Express Marker [Button A]
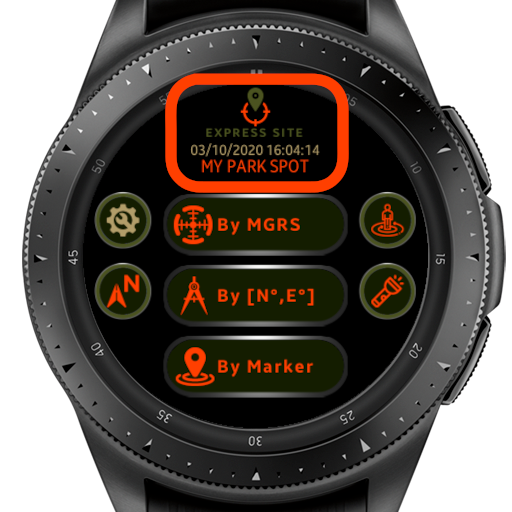
Navigate from your location to the express site. This can be any of your previous locations (address, coordinates, markers).
Flashlight [Button C]
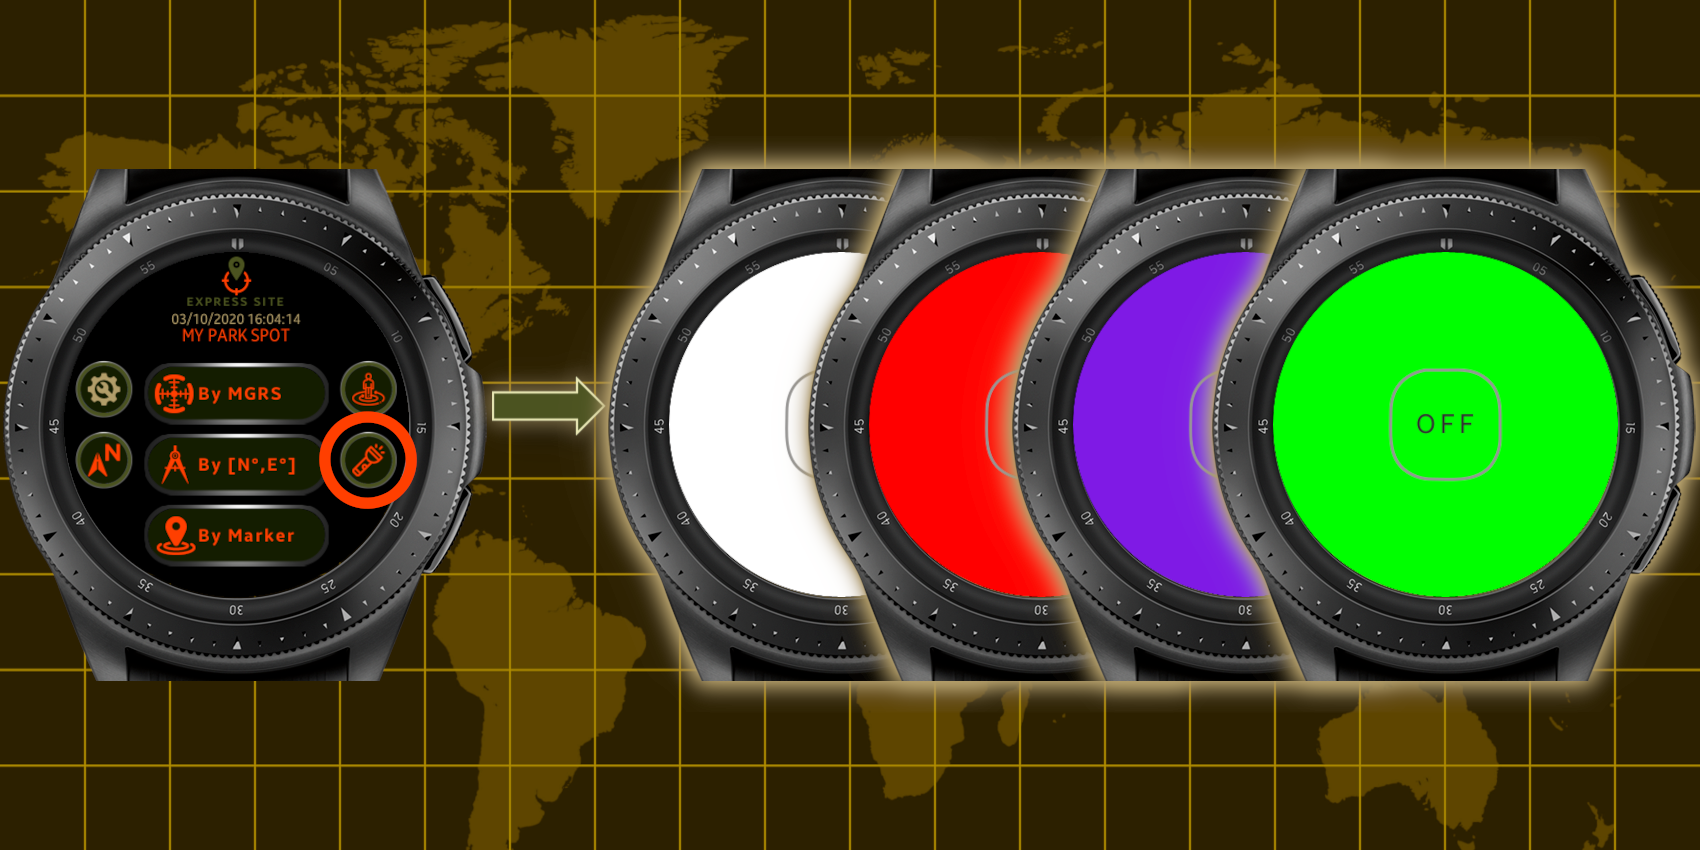
The app also includes a built-in flashlight with optional camouflage colors of red and ultraviolet.
The ultimate way to read documents in the field without being detected.
The flashlight will not turn off on hands moving gestures and screen brightness will be set to the maximum while the flashlight is on.
Settings [Button H]
Manage user settings and preferences.
Settings
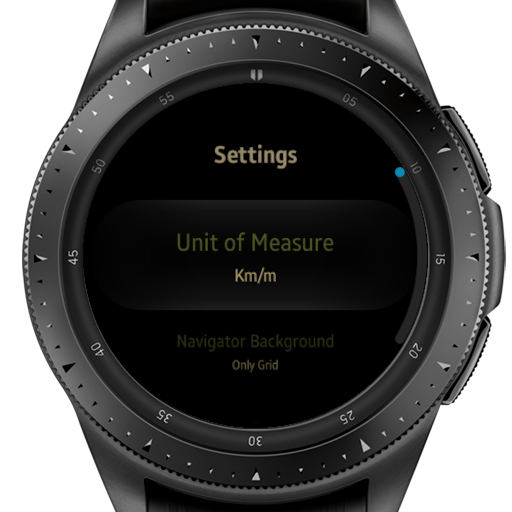
Scroll down the list of settings.
Unit of Measure
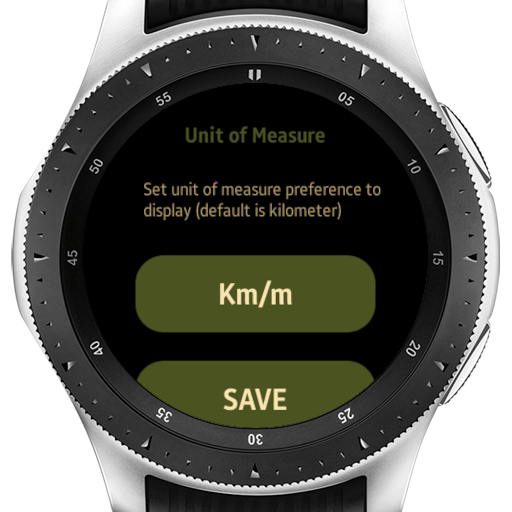
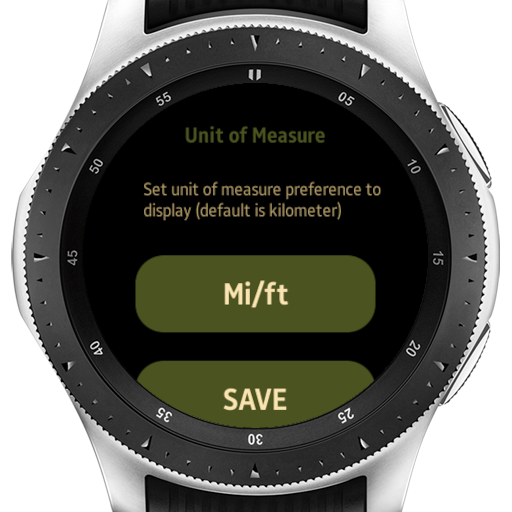
Set the unit of measure to display.
The default mode is "KM".
Navigator Background
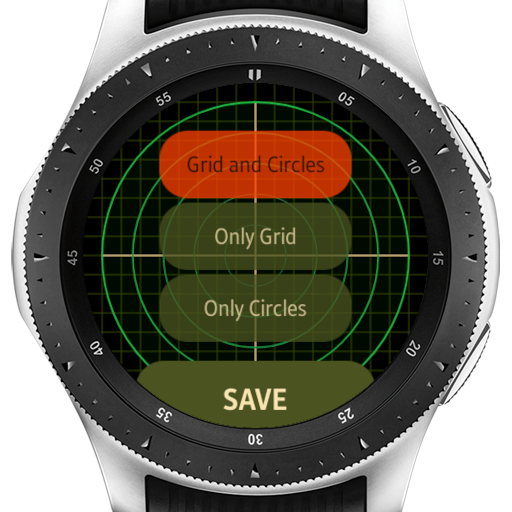
Select the navigation window background - only grid, only circles, or both.
This setting is also available via the quick navigation settings.
Sound Notification
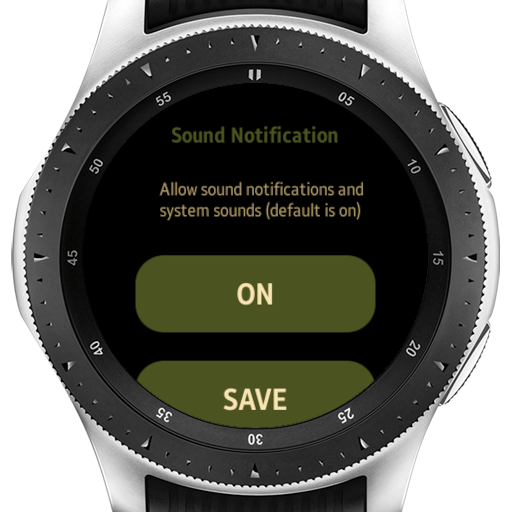
Allow sound notifications and system sounds.
The default mode is "ON".
If you need to silent do not forget to change this setting to "OFF".
Vibration Notification
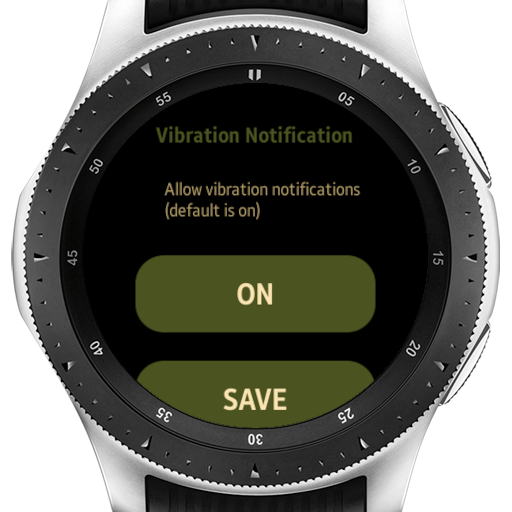
Allow vibration notifications.
The default mode is "ON".
Items Sort Type
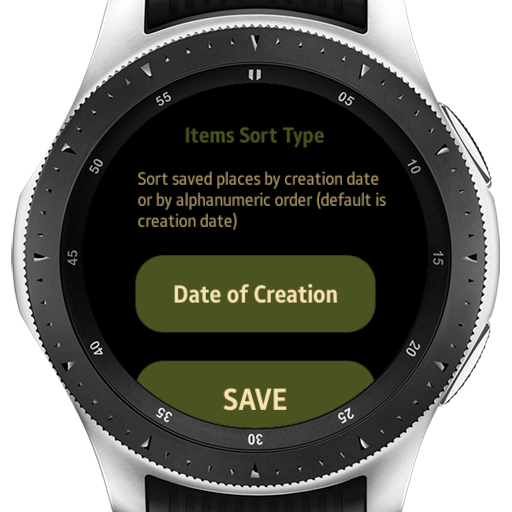
Sort saves places (addresses, coordinates, and markers) by creation date or by alphanumeric order.
The default mode is "CREATION DATE".
Screen Lock
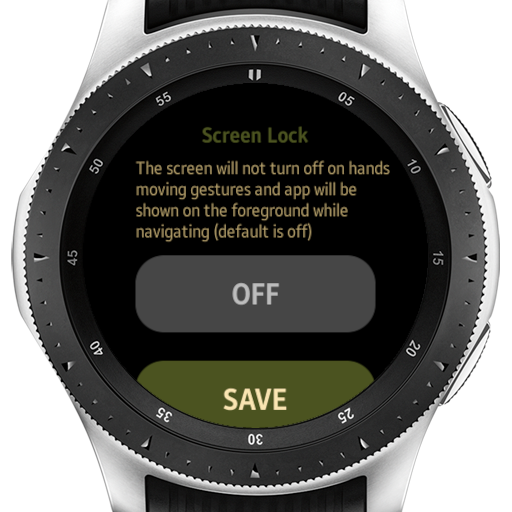
When "ON" the screen will not turn off on hands moving gestures and the application will be shown on the foreground while navigating.
The default mode is "OFF".
This setting is also available via the quick navigation settings.
Direction Arrow
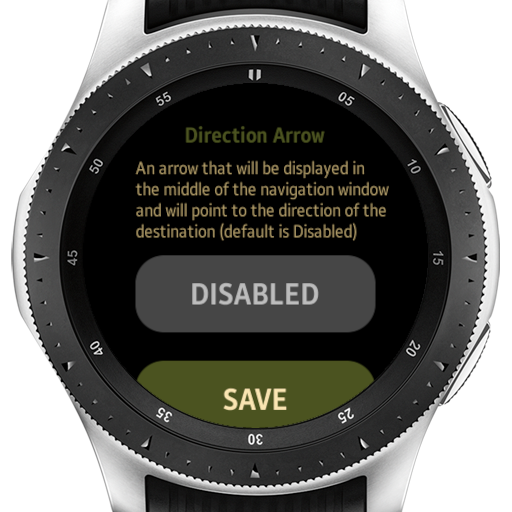
When "ENABLED" an arrow will be displayed in the middle of the navigation window, always pointing in the direction of the destination, relative to the current location.
This option is very useful when the navigation arrow is close to the destination, then the direction of movement to the destination can clearer.
The default mode is "DISABLED".
This setting is also available via the quick navigation settings.
Flashlight Color
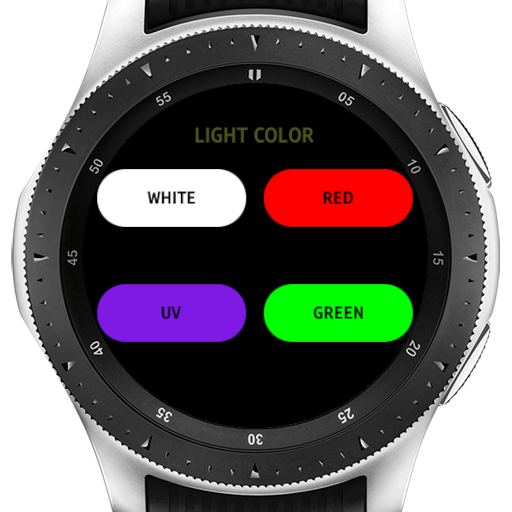
Select the color of the flash light, Default is "WHITE".
If you need to be camouflaged do not forget to change color to "RED".
Advanced Settings
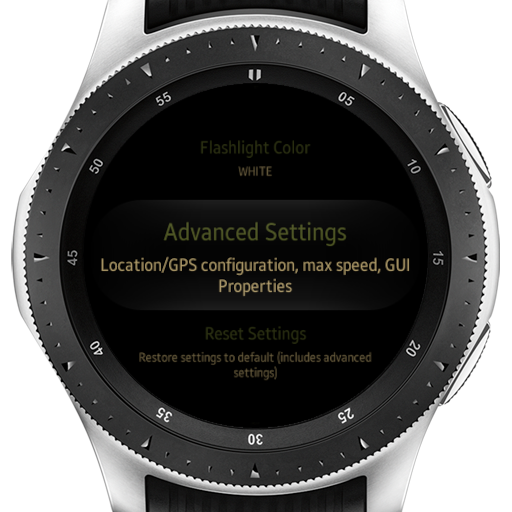
Additional advances settings.
Locator Type

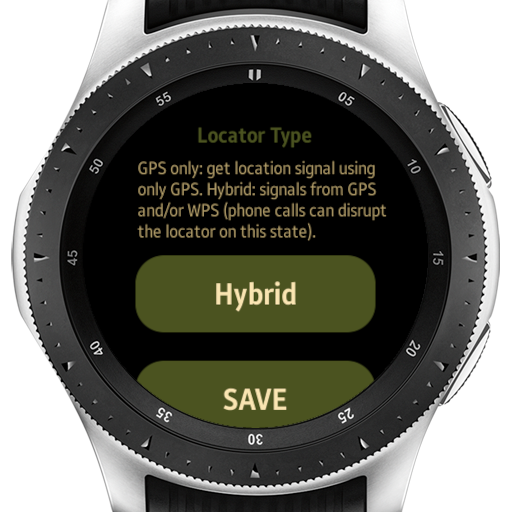
Select the way your location is gained.
- GPS only - get location signal using only the watch GPS sensor.
- Hybrid - Get location signals from the GPS sensor and/or WPS. Phone calls can disturb the location in this state.
Track Line Thickness
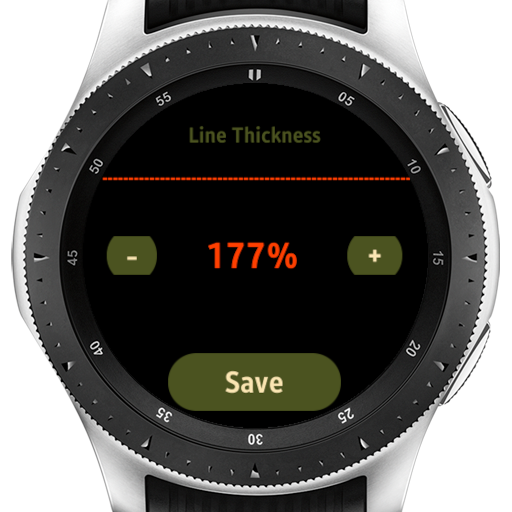
Set the thickness of the route track line.
Valid Speed Movment
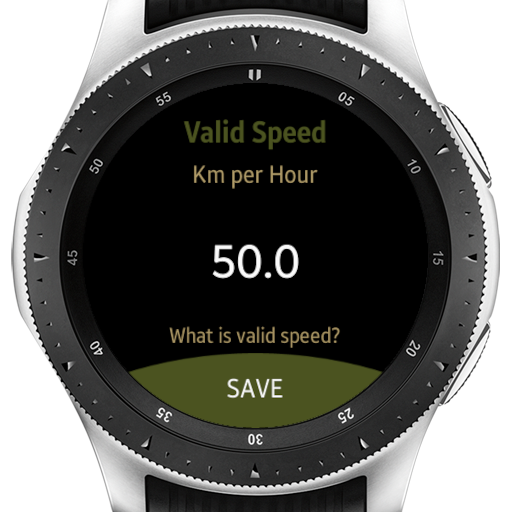
Moving in anomalous speed can confuse the GPS sensor.
Increase this value if your speed is higher than 300KM/186MPH (usually on an airplane).
Reset Settings

Reset all settings to default modes.
Note: the express site will be preserved.
Troubleshooting
1. Check the location permissions of the application: settings>>Apps>>Permissions>>Tactical Navigator - check the "Location" checkbox button (if not checked).
2. Enable the watch's location (GPS) and try it out in the open.
3. The watch should've been connected to the phone in the last 24 hours for the GPS sensor to work.
That is due to Samsung's operation system configurations and applies to all applications using GPS.
You can read more about it HERE .
Assuming that your watch sensors are OK, the app should work as expected.
News, Software Updates and Bugfix Messages
Version 1.0.0.1
The update includes:
• Bug Fix: Issue when a site is given a new description the previous site is returning to be current site was fixed.
• Minor bug fixes.
Update from: 06-10-2020 22:30:00 GMT+2
Version 1.0.2
The update includes:
• Raising the direction arrow automatically.
When your current location has passed a little more than half of the way to the destination, the direction arrow will be displayed on the screen.
The reason for this is that as long as you get closer to your destination, the destination flag and the navigation arrow are very closed to each other, as a result, the space between those elements becomes dense.
The direction arrow will clearly show you which direction you need to go. Read more HERE.
• The direction arrow color was changed from orange to military white and also bolder in order to be more prominent and to be distinguished from the track line and other elements in the navigation screen.
• Bugfix - after saving a new lat-long/MGRS coordinate, when editing the coordinate the edits were saved not to the selected item - this bug was fixed.
• Bugfix - default MGRS title was not advanced to MGRS1, MGRS2, MGRS3...NOW IT DOES.
• Bugfix - the bug that crashes the app when zooming the navigation window at the start of the navigation was fixed.
• Minor bug fixes.
Update from: 16-10-2020 22:30:00 GMT+2